
 Gardens
An attractively landscaped garden is a great feature, but it requires maintenance, time and effort. Is that decking going rotten? Is it dangerously slippery? Are there broken paving slabs or loose handrails to steps? Is there a pond that may be hazardous to small children?
First look at the size and shape of the garden; can you tell where the boundaries lie? Does it seem regular and consistent with neighbouring gardens? Often concrete posts are used to divide properties and demark the boundaries; see if these are visible. Is there access from a walkway or alley at the back or side of the property? How secure is the back gate?
Are the fences damaged? The cost of replacing a simple panel fence set in concrete in the ground is around £80/linear metre. Disposal of damaged material is extra. This may seem a simple DIY job but don’t overlook the cost of materials mounting up.Some sources suggest that a fence constructed to the British Standard (1722) should last around 15 years. However,careful treatment every couple of years will significantly extend the life.
You might try gently and discreetly leaning on the fence to test for movement!
Walls are constructed of many differing types of materials. They may be retaining significant amounts of soil, especially on terraced sites. Hence,there should be holes to allow the soil to drain. Look for cracks or significant leans. Again like fences, the cost of disposing of a damaged wall is very time consuming, heavy and costly, before it is even rebuilt. We estimate £120 per square metre to simply rebuild a wall that is 9” or 220 mm in thickness, assuming that the foundations are acceptable and that does not include disposal of the old wall.
The words “Japanese Knotweed” strike fear into the heart of any home owner, let alone a purchaser. And this is becoming more common in Bristol and we are receiving more and more calls to confirm its identification. We have found it from Clifton to St George and St Pauls to Fishponds, to name a few areas. But it can be eradicated! So, if you see a plant you don’t recognise, Google images will help, but be wary of a quick identification as many plants look very similar. Some web sites do offer free identification from photographs, but often they do not respond if they are busy so don’t expect too much for free.
Again trees can cause concerns for even the most experienced purchaser. If you are viewing in winter, remember that full summer foliage will shut out daylight. Leaf falls from nearby trees block gutters and drains. Tree roots can damage the foundations and drains, causing subsidence issues. Such roots can lift paving, too. Remember the rule of thumb that the height of the tree is often the spread of the roots.
is the tree a particularly large or a striking specimen,if so ask the vendor if there are any Tree Preservation Orders in place. If so, even basic maintenance will need planning permission!
And those high, thick hedges will require cutting regularly in the growing season, as well as draining all the moisture from the adjacent flower beds.
Floors aren’t just places to put soft carpets or smart tiles. They are integral to the structure of the building, providing support for the internal walls. Hence they need to be firm and reasonably level.
They are generally either ‘solid’ or of suspended timber.
These are made of concrete and can be found as the ground floors of properties of any age. They may be original to the property or put in place when the house was refurbished later. They are very common in 1950’s housing as the shortage of timber meant concrete was a cost-effective alternative.
Such floors should incorporate a damp proof membrane that should link to a damp proof course. This is an area of potential weakness! Solid floors in older properties can be problematic as often they have replaced original ‘breathing’ timber floors. So if you find solid floors in a Victorian house, look out for blistered decorative finishes near floor level, caused by dampness. Look for any movement in the floor – is it flat and level? If not, this can suggest a chemical attack or poor laying technique.
Some properties have solid floors in parts of the ground floor (particularly extensions) with suspended timber in other rooms. And there are likely to be fitted carpets or parquet flooring, ceramic tiles or vinyl covering the floors.
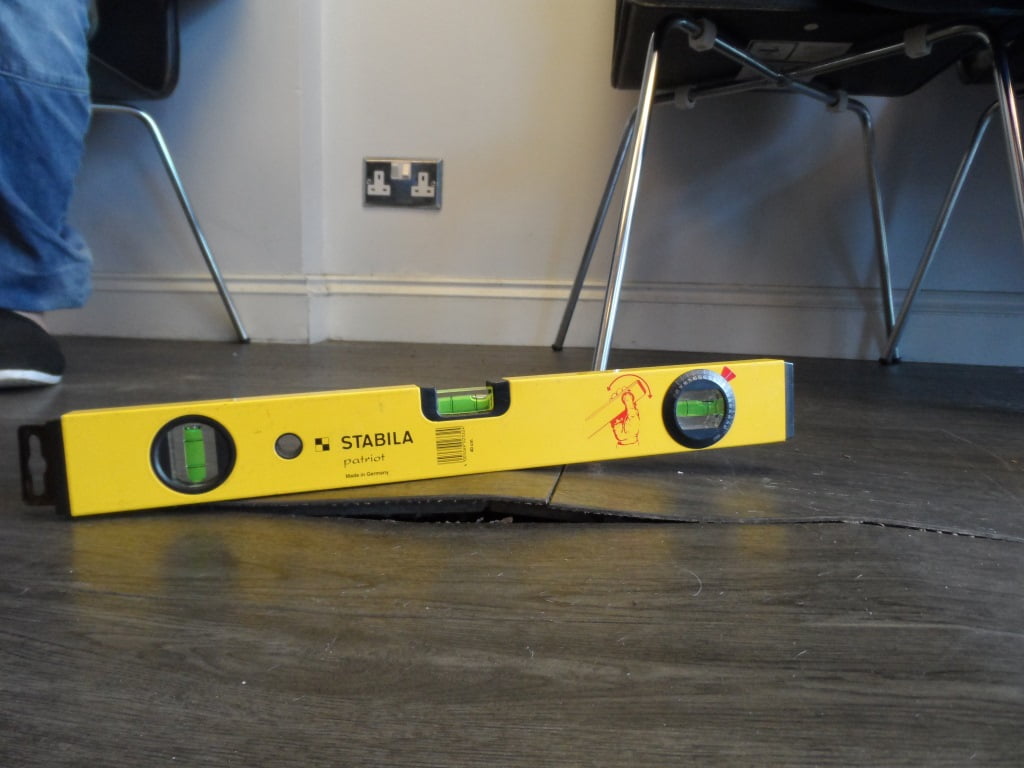
The easiest way to differentiate between solid concrete and suspended timber is the “heel drop test”. Basically, stamping or jumping on the floor! Is there is any give to the floor or reverberation of the furniture in the room? Then chances are that it is a suspended timber floor. If it is hard and your body jars, then it is likely to be a solid floor.
Is there noticeable reverberation when you impact the timber floor? If so, this may suggest issues with the joists beneath – perhaps they are damaged or undersized. This applies to both ground floor and upper floors.
It is also very common in certain areas for timber floors to slope. The agents refer to “Easton Creep” in BS5 postcodes, as most properties there have settled over time and the floors slope. As long as the movement is not on-going, this is acceptable. Assuming you can live with it?!
Timber floors are vulnerable to any dampness as timber will decay when in a damp situation. And the ground underneath a building is damp!
Substantial decay in timber has a very distinct mushroom smell , so use your nose! What can you smell? Take a look outside – are there plenty of airbricks? These should be present to both front and rear of the house with suspended timber floors. They allow air to circulate beneath the house to prevent condensation and rising damp building up, decaying the supporting timbers. Even when an older property (say Victorian) has been “damp proofed”, remember that the floor joists are still likely to be built into damp walls.
Frequently in older properties, floor boards show evidence of wood worm when uncovered. Are there any lighter coloured holes or small tracks on the timber? This may suggest an active infestation and may indicate that there are further infestations out of sight, possibly in the joists or rafters. And an infestation may prove costly and disruptive to treat to prevent it spreading. Treatment includes lifting the floor boards and spraying the undersides of them.
Are there loose floorboards beneath the carpets? These can form a trip hazard and make a lot of noise when walked on. The soles of your feet are useful tools! Offer to take off your shoes when entering a property – especially if the vendor is there! This not only shows respect but will give you the opportunity to feel through the carpets for any loose boards.When these are split, cutting new boards and securing them correctly can be very time consuming.
In newer or refurbished properties, chipboard is often laid over the joists, especially on upper floors. Chipboard will sag over time anyway. And new floors are often installed fast, meaning they are seldom are well laid with supports where the joints meet. So these chipboard floors often creak! How much noise can you tolerate? Can you live with the creaking?
Do check the condition of the floor coverings, which can be costly to repair or replace.
Where high quality solid timber or engineered floor coverings have been laid on a DIY basis, the joints can open up or sections can lift, due to poor fitting and thermal expansion. Re-laying floors of this type is expensive.
Are those ceramic or slate tiles cracked? If so, will the pattern and size be easy to match if necessary? Runs of tiles only last say 5 years so replacements may be hard to obtain.
When laminate is mopped many times, it tends to absorb water at the joints (called crowning); then it is unsightly and can be a trip hazard.
In properties built around the 1950s – 1970s, plastic type tiles were used which often contain asbestos. Sometimes these can be identified by their deep colouring, commonly red, green or dark brown.
And do ask what carpets will be included in the sale, as well as those matching curtains…
Internal walls divide the living space into rooms. They also give strength and structure to the property. Imagine putting a heavy weight on the top of a very large box – it would normally collapse. If you sub divide the box into four smaller areas and put a load on the top, it is likely to bear a lot more weight before it collapses. Houses are very similar. Large open plan spaces in buildings are often a key selling feature. Unfortunately many such open plan areas were originally sub divided, with internal walls supporting the structure above. If adequate replacement supports have been provided, fine. If not, what is most attractive can also be most costly to rectify.
Have you seen builders tapping walls? This is for two reasons – one to see if surface plaster has blown, the other is to determine if walls are solid or stud. A dull thudding sound often suggests a solid partition. These can be made from lightweight blocks or of old timber frames loosely infilled with bricks. When viewing an older property, look for cracks which could signify movement. If the partition wall is leaning, this may suggest something has moved or bowed over time, usually the floors above or below.
These consist of timber frames which are covered both sides with either plasterboard or lath & plaster, depending on the age of the partition. Contrary to popular belief, stud walls can become load bearing over time – when buildings settle, weight loading can be transferred onto the timber studs. If the building is timber framed in its construction, they certainly can be load bearing! They may be designed to be structural.
After the war experimental partitions of various types were used. Usually this occurred in system build and council houses but some types have been revived in more modern properties. These can sometimes be identified because their thickness is less than 110mm, sometimes as thin as 50mm.
After the war, Paramount partitions were common in Bristol and in PRC (PreCast Reinforced Concrete) houses. The construction was a plasterboard sandwich with cardboard infill for strength -imagine an eggcartontype of configuration.
Stramit was another interesting one. This time, compacted straw was sandwiched between plasterboard. These were more common in Gloucestershire. They can be very problematic if leaks happen; we have seen plants growing from internal walls as the result of a leak!
Another system we have seen in Gloucestershire, most recently in a bungalow in Coal Pit Heath, is the “clay pot” or extruded clay brick. These are similar to blocks seen on the Continent and were mainly used in the 1930’s and 1950’s. However, you are unlikely to be able to identify these on a viewing.
This is a very quick and easy way to disguise poor plaster or dampness. It is literally gluing a plaster board onto a wall or nailing it onto timber battens again attached to a wall. Where dry lining is present, normally as the inner face of external walls, be wary! Our YouTube video shows the problem, diagnosed by using thermal imaging. If a hollow sound is heard when you tap the inside of an external wall, be suspicious.
In our first section about viewing a property, we suggested looking at the floor plans of similar properties nearby. Trawl the estate agents’ websites! These can give you an indication of the original layout of the house you are considering. Have walls been removed? If so, they should have been inspected in advance by a competent person (a structural engineer or surveyor) to check whether they are load bearing, structural. Ask the vendor if they removed the wall or whether there is any documentation to support the removal of the wall.
If the wall was load-bearing, supports should have been put in place to carry the weight of the structure above. Sometimes smaller nub walls are left to support steel lintels or there are boxed -in downstand beams. Keep an eye out for these – if they don’t exist, you may need to insert them later. Look for any signs of stress along the line where the partition was located, or where the beam is built into the wall. Cracks or failing plaster would be probable indicators.
Ceilings are made from a variety of materials and each has different associated problems!
Did you read our blog on inspecting lofts and venture into the loft space (wearing a PP3 mask)? If so, you might be able to lift the insulation and see the type of ceiling material below.
Lath & plaster ceilings were used extensively pre 1940. They comprise wooden laths coated with various layers and thicknesses of plaster. The plaster may contain ash, horse hair and lime.
While working for many leading insurance companies, we have inspected countless collapsed lath& plaster type ceilings.Lath & plaster can and will eventually fail. It happens in the most expensive houses which have decorative cornices that run into thousands of pounds to replace in a single room. It also happens in pre 1930 council houses. Famously, the ceiling collapse at the Apollo Theatre in London in 2013 injured over 70 people. Such ceilings are seldom used now except in restoration work in listed buildings.
These ceilings are very thick, normally around 20mm. The tell-tale signs of failure are cracking, an undulating surface and sagging. Finishes such as lining paper tend to mask such cracks but the undulations are easy to see. Sagging suggests that the plaster has detached from the wooden laths above. The cracking is not inregular, straight lines -it is normally diagonal and irregular.
Removing such ceilings is a very dirty job! And it is a real challenge to save any ornate cornices running around the perimeter of the room. This dusty job is often expensive as few want to undertake this work.
Sometimes you can deal with lath & plaster ceilings by underboarding them. Underboarding is screwing a layer of plasterboard beneath the lath & plaster to support it. This is an inexpensive repair but will lower the ceiling height and you will lose any cornicing.
Occasionally in the 1950’s and 60’s, ceilings were constructed from thin sheets of hardboard, ie reconstituted timber. It is normally fairly easy to spot these from underneath, as they have tape over the joints of the boards. This gives the ceiling a grid like type of pattern!
Since the 1940’s, ceilings have been constructed of uniform boards of gypsum known as plasterboard. These boards have a long service life.In the early days, when plasterboard was first used, the joints were not taped with a netting scrim. Hence minor thermal movements and stress cause straight line cracking, sometimes at right angles. When this is the case, the joints can be taped over and the ceiling skimmed. Sometimes nail pops are evident. As long as these are repaired properly (not just covered in filler) they are unlikely to re-appear.
These were most popular in the 1970’s. They were often used to disguise cracking or damaged ceilings. However, they are a fire hazard as they were not intumescent . If they catch fire, they can rain molten polystyrene, a scary image! These should be removed as soon as practicable. While removing the tiles is fairly easy, the plaster beneath will probably be damaged as a result. The spots of glue are also very hard to remove. So allow costs for the skimming often required after removal.
Timber cladding was another old favourite. These are strips of tongue-and-groove wood and hence are flammable. So they can pose a risk, especially if they are used in a Kitchen. The cladding is not fixed direct to the ceiling; it is often nailed to timber battens which are screwed through the ceiling. Removing these will disrupting the finish beneath. Hence you should only undertake this if you are willing to plasterboard and skim the ceiling beneath.
Artex has been used since the 1970’s, an applied finish with various patterns from stipple to swirl. It was sometimes used on plasterboard instead of a skim, so the characteristic straight line cracks, often with right angles, are very common. Patching Artex satisfactorily is very difficult and the repairs always seem to be obvious. Hence when a section is damaged, it is often better to simply skim over the entire ceiling. However, Artex applied prior to 2000 can sometimes contain traces of asbestos so scraping off the more pointy bits can be hazardous. If such ceilings appear damaged, then it is always best to have tested it prior to purchase, because removal of a medium size asbestos-containing ceiling costs around £800.00. And you will still have to replace the ceiling!
You are unlikely to get access to loft spaces when doing a general viewing. It’s easy to put your foot through the ceiling below when you slip on a joist! And this will be on the vendor’s household insurance or agent’s insurance so you would not be popular. So don’t be surprised if the agent will not let you check the loft void. Just smile, knowing we will check it thoroughly for you after you have made your offer.
However, you may be allowed to poke your head and shoulders through the access hatch, as for a homebuyer’s report. Or you may be buying a property privately.
Checking lofts is not for the faint hearted as spiders, wasps, mice, flies and rats also make these locations their homes. If you don’t like creepy-crawlies, don’t go exploring in a strange loft!
Some of the older types of loft insulation have been known to contain asbestos. So do be careful and wear a PP3 level mask before opening any loft hatch of an older property. And carry a torch with a long beam, as very few loft areas have lights.
There are three main aspects to consider in loft spaces:
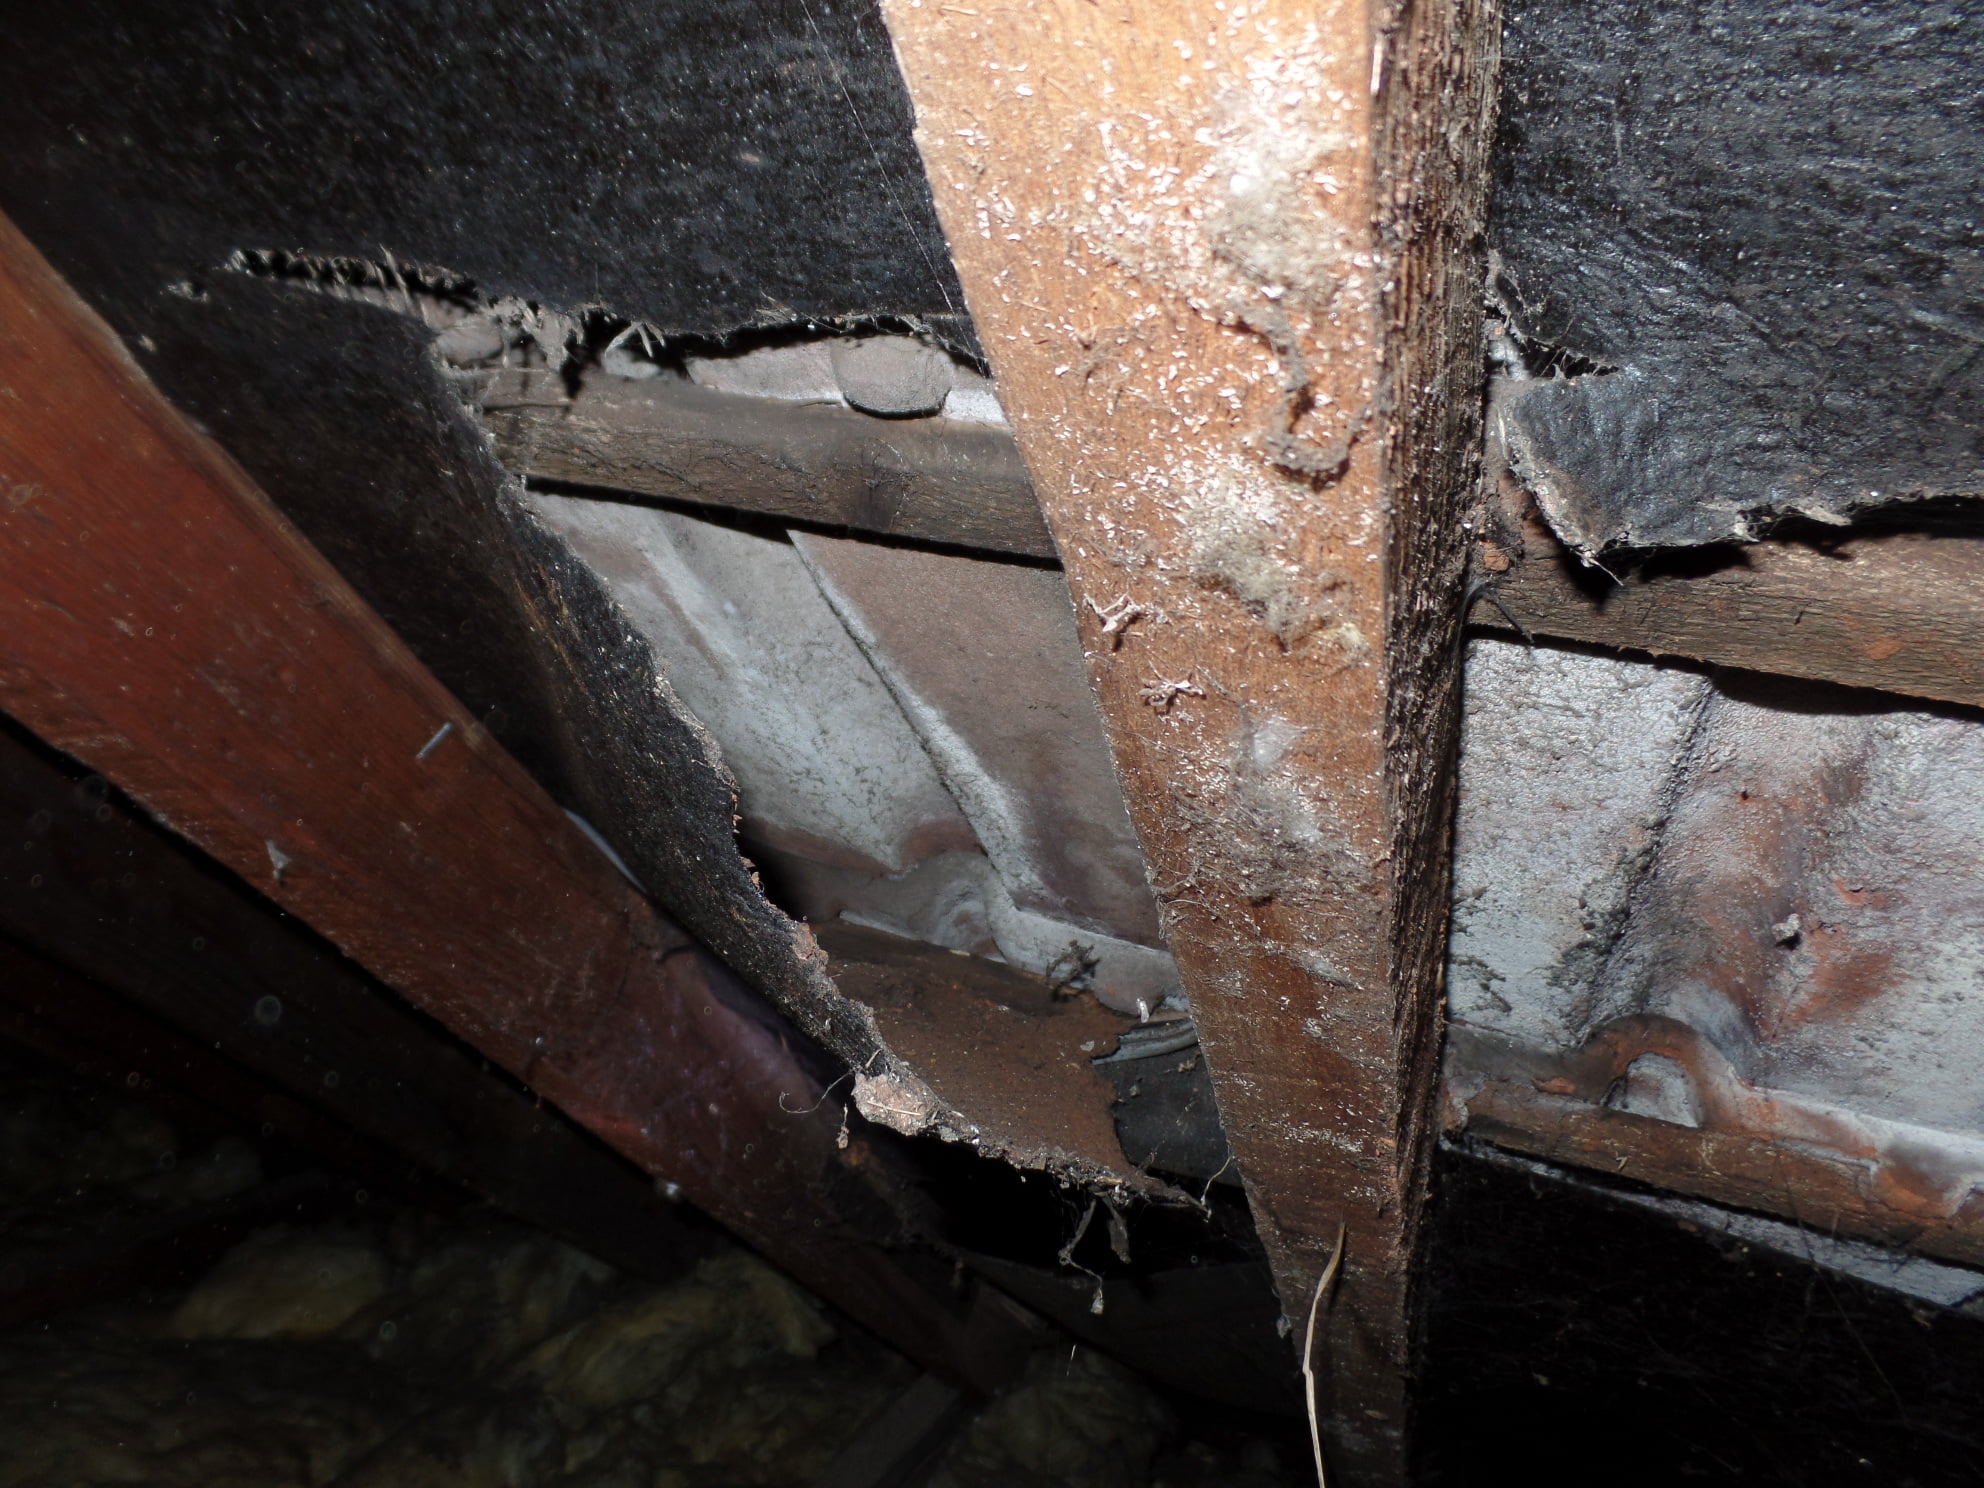
Roofing (sarking) felt is designed to keep the roof waterproof, lying beneath the tiles. It should stick out into the gutters.
One of the best easy tests is to simply turn off any torches or lights and look to see if daylight is visible through the roof or eaves. This suggests holes in tiles and felt or detailing (finishing) problems.
If the black bitumen type felt is present, this is a much older felt.If there are large rips or tears present, it may need replacing.This is a very expensive job -say £6k+.Differing colours of felt indicate where patch repairs have been made internally. These are rarely successful and again replacement in probably necessary.
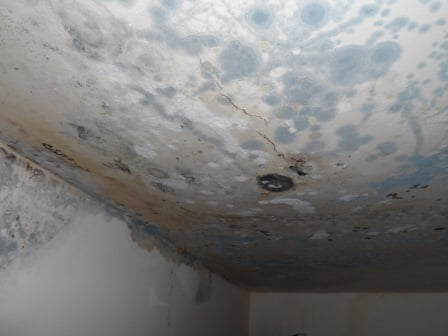
Is the felt white, blue or green coloured, with tiny dimples? This suggests that the roof has been recovered in the last 20 years with a stronger breathable type of felt and should have a long service life left. However, look for rips and tears, due to poor installation. And condensation can still cause mould growth.
The main things to look for are split or bowing timbers in a roof structure. Cracked timbers are often very noticeable as the sharp edges and shear nature of cracks tend to draw the eye. Rafters, struts and braces can often be strengthened internally without the need for expensive scaffolds.
Where major components such as purlins have bowed, this is seldom an “easy” fix. It may have been caused by heavier replacement roof tiles, for example. Often a new larger purlin will be required, at considerable expense.
Bowing timbers change the way that load is carried through the building. Bowed purlins and rafters do not transmit straight down at 90° and instead push outwards.This puts additional stress on the masonry. When rafters dish in this manner, it can cause” roof spread”, damaging the supporting walls below.
Keep an eye out for patches where the timbers have clearly been stained by water in the past (or at present!) This is most likely around chimneys, where the flashing above has been damaged. Rot may have already set in.
With the ever-increasing cost of heating, loft insulation has been retrofitted in many homes.
Beware! Older types of insulation were vermiculite, gold shiny coloured lightweight pellets and blown cellulose which looks like tiny fragments of newspaper – which is often what they were. These types have been known to contain asbestos. If these are visible, don’t go any further into the loft – be thankful you are wearing a mask!
Sometimes the loft floors have been boarded so it is difficult to add insulation.Modern Building Regulations require 270mm of mineral fibre. This is rarely achieved as the rolls normally come in 100mm thickness so 200mm is more usual.
Sometimes the insulation has been poorly installed or has been pushed right into the eaves. Then the loft space can’t breathe or ventilate itself. Condensation then builds up inside the roof void, damaging the timbers in the unseen areas in the eaves.
Windows form a large part of a building and give much of its character! They let in light but they are vulnerable to breakage, accidentally or deliberately. They can usually be opened for fresh air but can be a security risk. Hence they need to be lockable with a key, to be “approved” by insurance companies. They can also allow heat to escape from the building.
On a viewing, you can easily see whether window locks are present . Again, doors need to be provided with locks that are approved to a BS standard.
The simplest test to tell whether new frames are required? Open and close the windows in every room whilst you are viewing. This will take minutes to perform but will indicate the likelihood of a bill for replacement – from £400 per window depending on the size. Yes, even on newer builds – as one minute into this video of our surveys in Bradley Stoke shows! https://youtu.be/1FENY2nJ24Y
There are many shapes and sizes of window, in a variety of materials. Genuine Georgian windows had small panes because glass was difficult to make. The Victorians found new methods of firing glass and so large panes, often in sash windows, became fashionable.
Into the 1960s, window frames were made of wood.Older timber frames do offer good thermal performance and can give a long service life, assuming careful maintenance has been carried out. However, they are prone to decay. Sometimes decay is visible as rotting wood. Sometimes fillers have been used. Don’t be afraid of gently prodding, to test the timbers. The filler often looks smoother than the surrounding timber.
In the 1960’s, steel window frames were sometimes installed, often known as Crittall after the manufacturer. These are normally single glazed with very thin frames. Use a magnet to tell if the frames are steel. These frames perform very badly thermally and normally have a good coating of mould to show that. These should be replaced.
Aluminium frames were used in the 1980’s. These are lightweight and do not rust. They may have a small brown-coloured layer sandwiched in their construction. This acts as a thermal break to prevent condensation. If this is not present, replacement is certainly necessary.
As this older double glazing was a lot thinner, replacement is normally required anyway as it is not feasible to upgrade the glass.
The early forms of UPVC were often single chamber or extruded solid plastic,hence older UPVC windows often do not perform well thermally. Newer UPVC windows have multiple extruded chambers. These act as thermal pockets to make sure that they insulate the interior from the outside world. Combined with e-coatings, this gives one of the best performing arrangements available for the cost.The viable life of UPVC window frames is generally reckoned as 25 years.
Since 2002, new window installations should be “self-certified” by FENSA or CERTAS or in some instances Building Control will sign them off.
Ask the vendor or agent when the windows were last replaced. Are there any guarantees? If 2003 or later, ask if the relevant certifying documentation is present.
Single glazing is simply a single pane of glass.If this is the case, it usually indicates considerable age of a window installation. They allow a large amount of heat to leave the building and sums for replacing them should be budgeted. The reduction in heating bills should eventually pay for this alone! Large panes of glass can also be dangerous if unmarked.
Depending on the age of the installation, double glazing may be e-coated and toughened. We use some very special laser equipment to determine if this is the case,as can be seen on this link https://youtu.be/3fsDmGnaJjY . You will not be able to do this yourself, so look for the basics. Is there moisture (often looking like raindrops) in between the double glazed panes? If so, the seal to the double glazing has blown. These can seldom be repaired effectively and replacement is then required. This seal failure can often be as a result of pressure from the masonry, so look around these areas for cracks or distortion of the walls.
Again, doors may be timber, metal or UPVC, with or without glazed panes. The frames can warp, the locks can be ineffective. The hinges can sag. Replacement UPVC doors can cost upwards of £500, much more for French doors or bi-fold doors. So do make sure you check them by opening and closing them.
While antique glass in doors, particularly entrances and hallways, is very attractive, it can be a safety hazard. It is unlikely to be toughened so is easily damaged by impact. If you have small children, do bear this in mind!

We aren’t trying to turn you into Surveyors! We are just aiming to alert you to watch for obvious problems before you make an offer on a property and begin incurring expense. And one of the first things you see about a house is its walls.
External walls support the roof and are therefore load-bearing. They give strength to a house; as well as security, they provide insulation, sound-proofing and weather-proofing from the outside world.
The walls might be constructed from stone, brick, blockwork, timber or from non-conventional materials such as pre-cast concrete. Non-standard properties will be covered separately, later in this series.
Victorian and Edwardian houses normally have solid walls. Pre-1930 properties normally have solid walls with some exceptions.Solid walls are not particularly practical from a weatherproofing perspective. Driving rain can (although seldom does) saturate solid walls where no other weatherproofing has been applied, especially in exposed locations. After the storms of 2014, we attended hundreds of properties on behalf of insurance clients where this had happened.
Often such walls have been covered with a sand & cement render. This helps to reduce water penetration issues, as well as being for decorative purposes. However, render has its own associated problems, whether recently applied or older. Dampness can get trapped behind it. Look out for any cracks that could be allowing water to penetrate to the surface behind. These will need to be repaired.Also, tap sections of the render and see if a hollow sound is heard. If so, some repairs to the rendering will be required.
When you are inside the house, open a window and measure the thickness of the wall. A single brick is around 4.5” (115 mm) thick. If the wall is around 9-10” or 230mm-260mm thick, then it is likely to be solid, constructed from two rows of interlinked bricks. Remember plaster and render will make up some of the thickness.
Historically, the Local Authority Building Control function was not always such an active body. Hence many extensions and alterations have been carried out using thinner brickwork, which is not compliant with current Building Regulations. Again, measure through a window.If the thickness of the wall is less than 150mm, this will cause problems of thermal inefficiency. Also,a mortgage valuer is likely to regard such extensions and alterations as ‘non habitable space’.
From the 1930s, cavity walls were generally used in Bristol. However, there are still many examples of solid walled properties from the 1930’s and just this week we surveyed a 1950’s house with solid walls. Again, measure the thickness through an open window. If the wall is say 12” or 300mm thick, it is likely to be of cavity construction. The inner and outer leaves of brickwork are fastened together at intervals by metal ties.
If the brickwork is visible, then stand back and look for regular hairline horizontal cracks every five courses of brickwork. This is indicative of “tie failure”(see our video https://youtu.be/dtW5vaTk0zA)which is very expensive to remedy. If there are numerous examples of differently coloured mortar,possibly the property has suffered from such an issue in the past. It may or may not have been correctly addressed.
Now look for small holes that have been drilled into the wall at regular intervals. These can suggest that the wall has been filled with cavity insulation at some time. The effectiveness depends on the type of material used and the skill of the installers. Cavity insulation can be associated with significant problems such as dampness. This type of work is normally backed by guarantees and you can query the existence of these with the vendor or the agent.
Stand back and see if the walls appear true. If walls are leaning or bowing, this can indicate significant faults, possibly suggesting inadequate tying or problems with the roof structure. These again can be time consuming and expensive to fix.
Are there cracks in the external walls?If these are wider than say 2mm and seem recent, there could be trouble ahead. Check whether these are mirrored internally or if significant filler has been used – this is normally easy to spot.Such cracking can indicate movement in the property, from a variety of possible causes.
Do these cracks extend downward towards the ground, below a damp proof course? If so, they could indicate movement in the soil and the dreaded subsidence! Perhaps caused by issues with the drains or that large tree in the front garden…
The UK is a wet place as we all know! The Bristol area averages around 800-900 mm of rainfall a year, which is slightly above the UK average. Even more rain fell in recent years such as 2012 with weather conditions changing. Interestingly, in the past, South Bristol has been wetter than North Bristol.
So this rainwater must be diverted from your roof into your gutters, on its way to the drains. Gutters don’t just remove rainwater, they are an integral part of the house design and character!
They should prevent water from penetrating the tops of the walls and leaking gutters can often cause dampness problems. Furthermore, this is sometimes wrongly diagnosed as rising damp and a large inappropriate repair bill follows – although just replacing the gutters would have solved the problem.
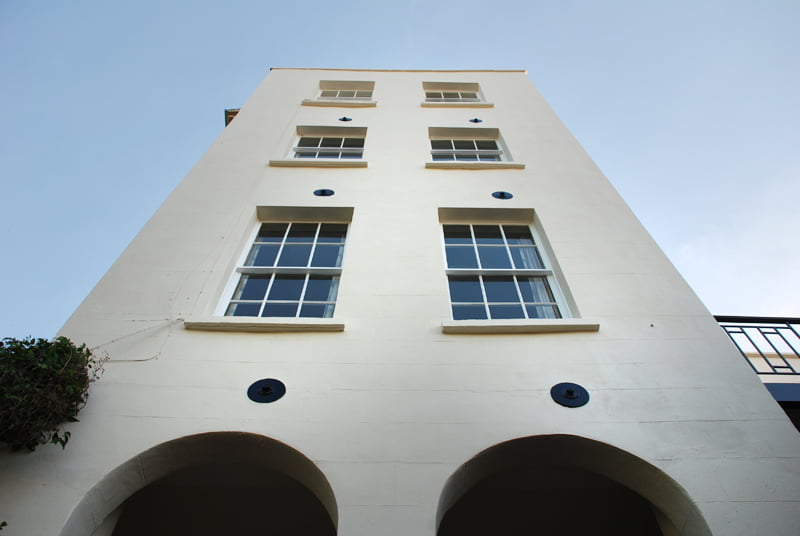
Gutters have traditionally been made from many different materials. Historically, timber has often been used in the north of England, usually lined with lead. More common to Victorian era housing is cast iron and this is prone to rusting. In older properties, especially around South Bristol and Clifton, the gutters may be hidden behind parapet walls at the front of the property. Some Bristol properties have ‘butterfly’ roofs, where the gutters run in a valley hidden behind this parapet. Hence in such cases, inspection from ground level is impossible.
More recent gutters can be made from asbestos type cement, which therefore will be expensive to remove. Fortunately, you can carry out a simple check for asbestos gutters and pipework with a magnet; see our video https://youtu.be/tfihb5NdZRk . Recently, some gutters, especially long runs, have been made from extruded metal, usually aluminium, but the most popular material is UPVC – ‘plastic’ guttering.
Now, you are looking for evidence of leakages and blockages.
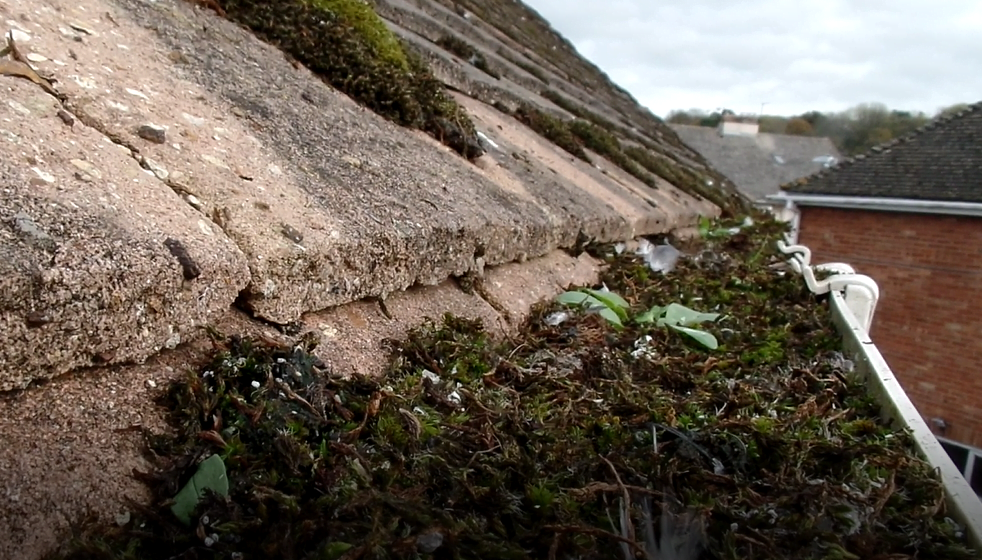
Can you see any organic growth sprouting out of the gutters? That’s a sure sign that maintenance has been poor. Are there any overhanging trees whose leaves may have blocked the gutters in autumn?
Next, stand back from the building to check that the gutters are set to the correct falls. They should run in a straight horizontal line towards the downpipe with no dip or deviation.
Gutters should normally have supporting clips spaced at around 750 mm apart. Since the average man’s footstep is around 780 mm, you can pace the length of the gutter with an “average” man and there should be 1 clip per footstep. However, if sufficient clips are not present, the gutters can twist or bow or sag. When this happens, the correct fall is lost and they will start to leak as the weight of water causes pressure which damages the joints.
The joints between the lengths of gutter are usually located at the clips. Hence this is an easy place to look for heavily stained or soiled clips, suggesting leaks in these areas. And if a gutter has been leaking for a long time, stalactites may have formed on the underside of the gutter where water has been dripping. Another great giveaway is staining to the wall; this normally takes the form of darker streaks or patches or green algae or moss growth on the wall. Take note, because this will certainly indicate problems not only with the rainwater goods but potentially inside the property as well.
However,unless you can find a high level vantage point, you won’t be able to see inside the gutters; we use mast cameras as standard on our building surveys to check for blockages and detritus in the gutters.
Now look at the junctions connecting the gutter to the downpipe; these often incorporates an arrangement of curved sections. These joints are not normally supported by clips and are vulnerable to movement hence they are always susceptible to leakage. Again, this is a very common fault so look for moss growth or staining around the joints.
The downpipes should have clips securing them every 1.8 m. Again the average man is around 175 cm in height so this is a good datum. Downpipes often become blocked with moss and other detritus. So give them a knock to see if they sound hollow; if a dull sound is heard, then they may be full of moss and need to be cleared out.
The modern UPVC extruded parts for guttering and downpipes are very cheap to buy and the largest cost with installation is normally the labour element. As a result extensive repairs to gutters are normally a bad idea! Simply replacing them and obtaining a longer life is usually a better use of your money.
Lastly, are there any water butts at the foot of the downpipes? If so, are they overflowing into the foundations of the property? Do the downpipes lead into drains or do they splash their contents over the ground beneath, encouraging dampness, especially around bay windows ? We deal with dampness in another section, but the condition and design of the rainwater goods can give you some valuable pointers!
Flat roofing has always had a bad reputation; some surveyors say deservedly so. The defects are normally due to poor workmanship or poor quality of the materials used in flat roofing. Even though they are called ‘flat roofs’, they are in fact pitched, normally below 10 degrees, to allow rainwater to drain from the surface.
Some insurers will expect a professional to inspect a flat roof every 5 years and produce a report about its condition. This is worth bearing in mind! The older styles of built-up felt have limited lifespans (of say, 15 years) due to the degradation of the covering caused by the UV rays in sunlight. Again, some insurers will have specific exclusions as to any loss or damage caused by the failure of a flat felt roof that is 10 years old or more.
If possible, try to ascertain what the flat roof is covered with. During your viewing, often a window will give you a good view of a single storey flat roof. If it is two storeys, unless you can see from some other vantage point, a mast camera becomes essential. A specialist roof survey may be required by some Insurers and mortgage companies. The “drips”, the pieces that overlap the edge of the roof,will also give you a good idea of the material.
It would be normal for older type of felt roofs to be constructed from three layers a felt stuck together with hot bitumen to then be covered in “chippings” or small pieces of gravel. This is important as it shields the vulnerable felt from the sun’s rays. There should be a complete covering without missing patches.
Sometimes flat roofing can appear silver. If so, it has been painted with a solar reflective paint. If it appears to have been painted grey, possibly a reinforced type paint has been applied over an already failing roof covering. This suggests a very limited lifespan.
In the past, metal has been used for high performance flat roofs. Although expensive to fit, it tends to have a good life when well installed. Look for any tell-tale discolouration, such as brown staining from the use of cast lead as opposed to milled lead.
When zinc, lighter silvery coloured metal, has been used, be wary. These do not benefit from the same longevity as lead, often because the cheaper materials attract less skilled installers. Such roofs also suffer from corrosion from the atmosphere.
More modern fibreglass style roofs are normally lighter grey in colour and appear to be constructed from a single piece with no obvious over-laps or raised seams. These would normally come guaranteed for 20 years or so; ask the vendor or agent if it has a guarantee.
The most recent form of flat roof covering is of EDPM rubber membrane. These high performance roof coverings are laid in relatively few strips with the seams being almost flat as the rubber is about 1mm in thickness. They are normally fitted by the manufacturer’s approved installers and come with insurance backed guarantees. Again, a quick question can put your mind at rest.
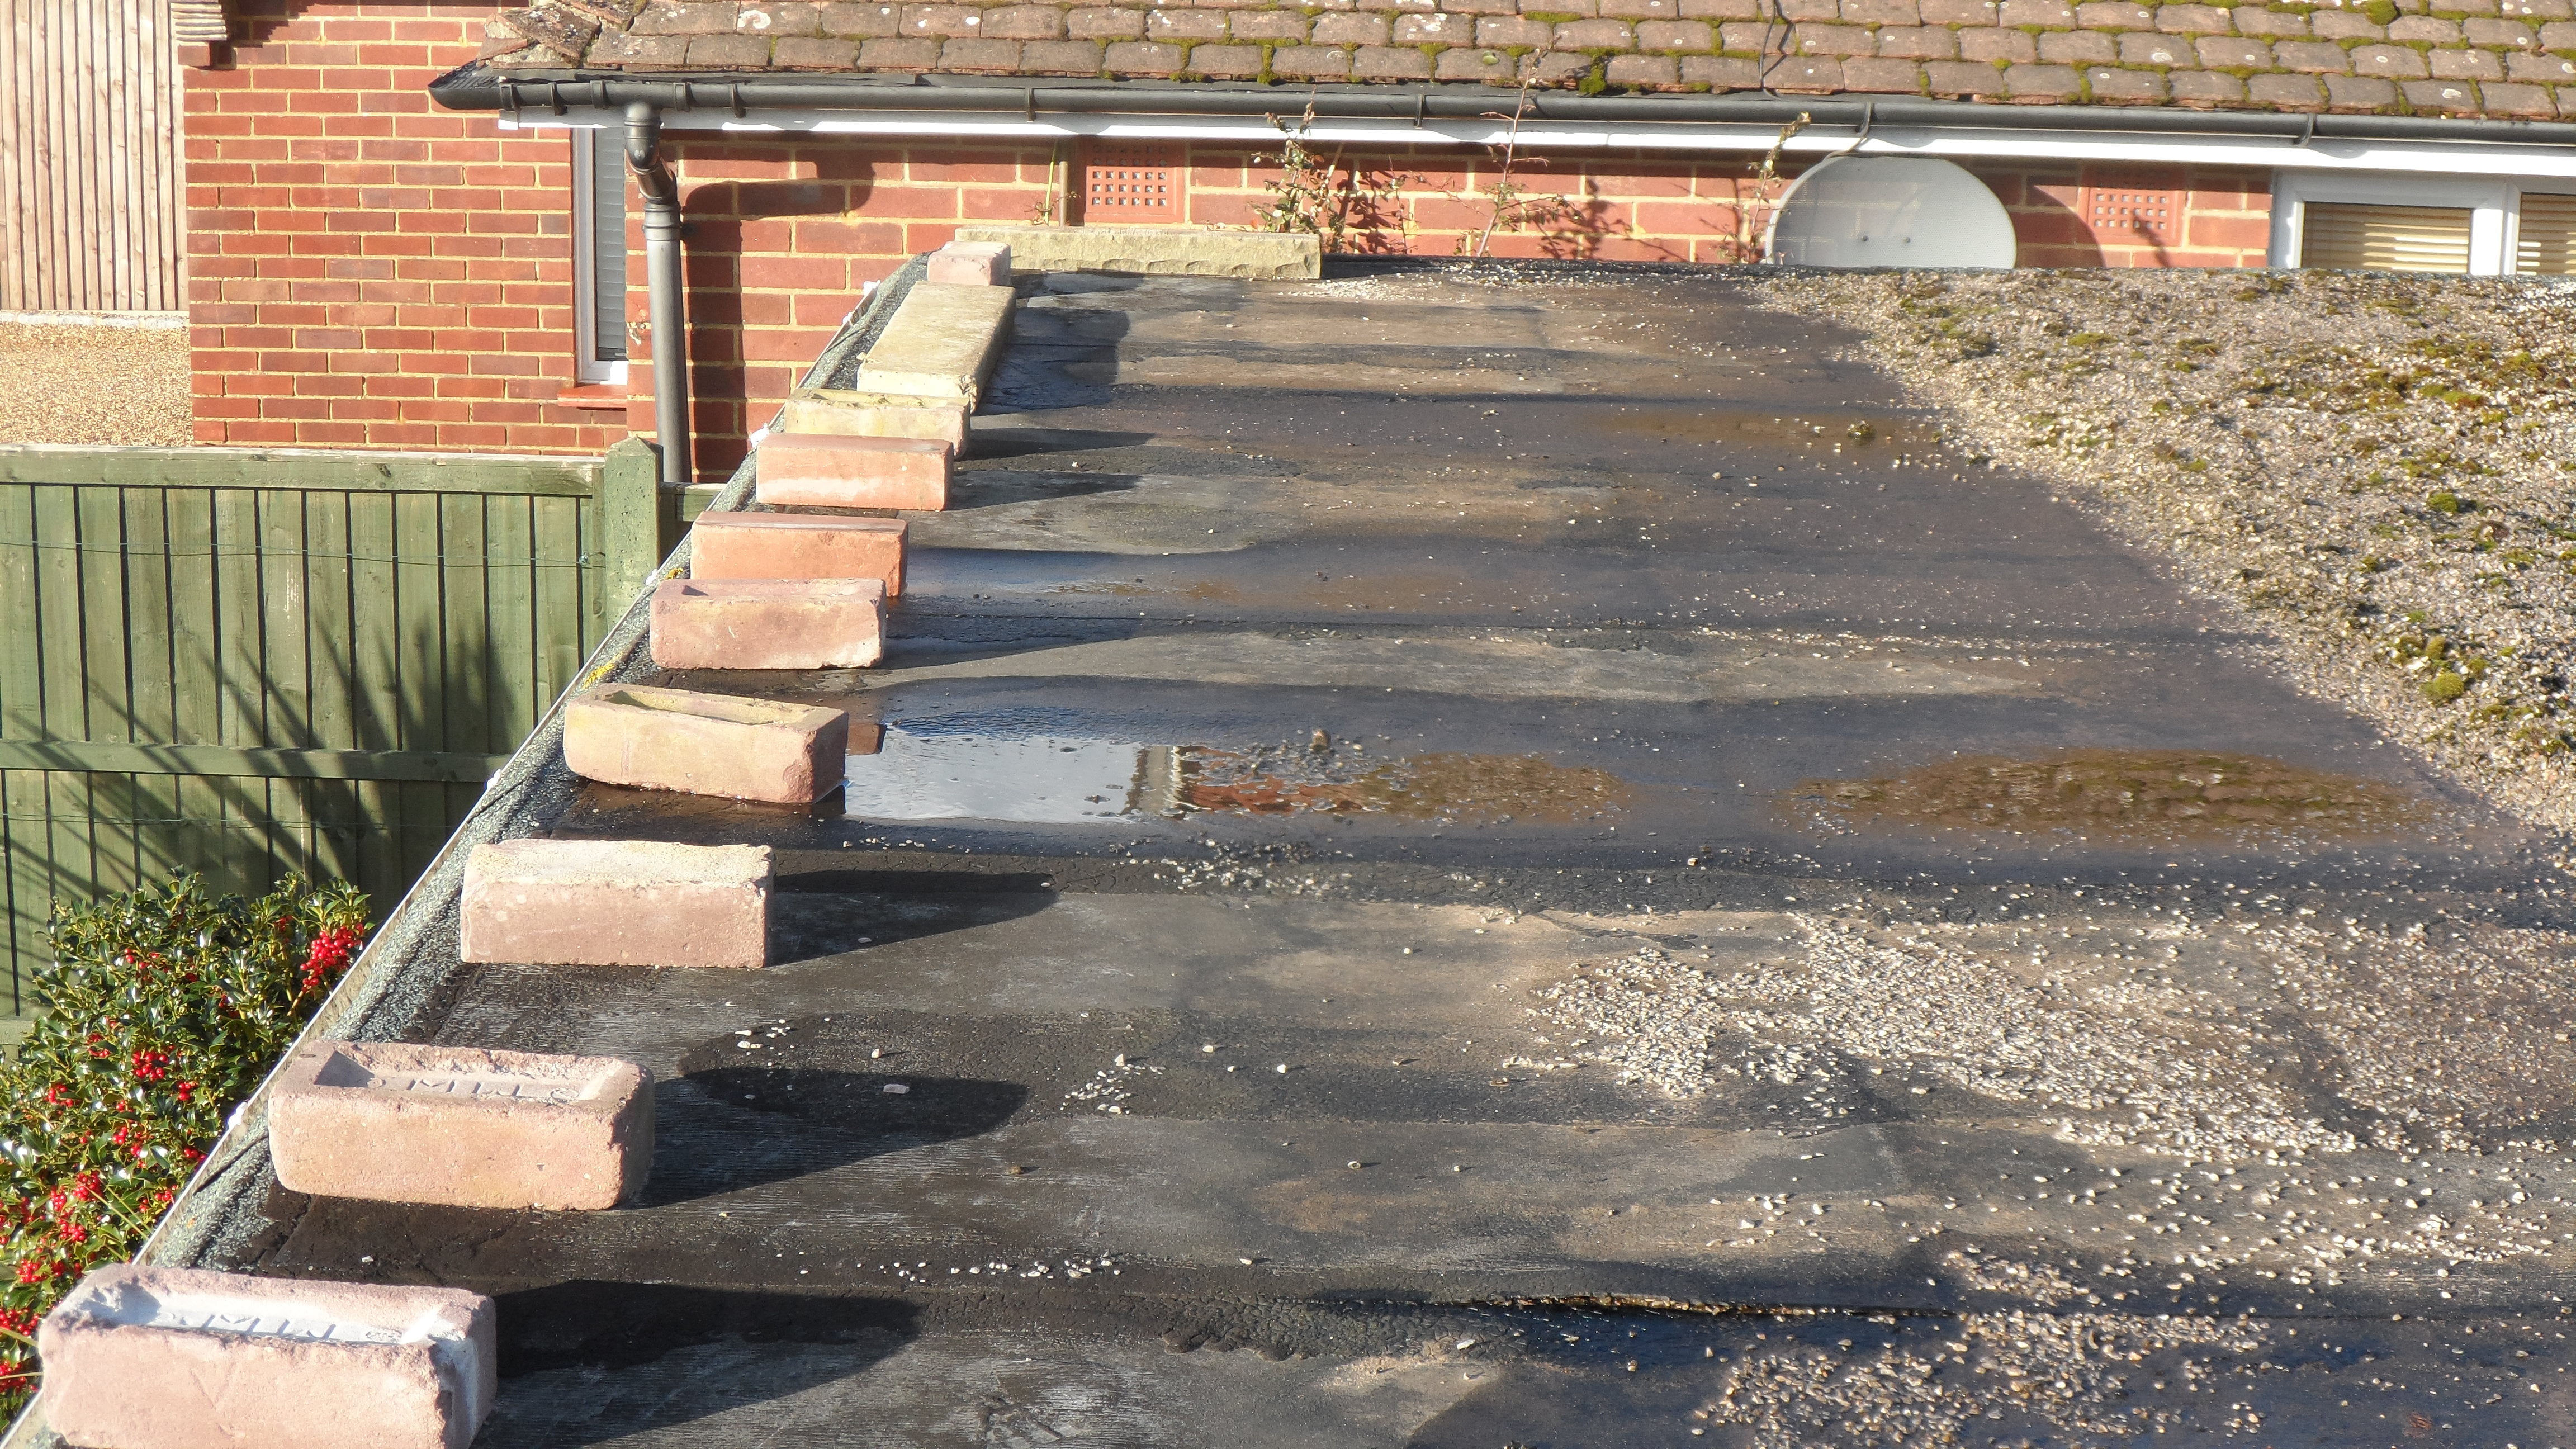
One of the most common issues with flat roofing is ponding. Rain water creates ponds on the surface because the roof coverings not able to drain properly. The weight of water usually causes premature failure. For fibreglass roofs, a certain degree of ponding is acceptable but not desirable. Even if it is not raining,any ponding should still be visible as it leaves tell-tale darker patches. Significant moss growth on the surface is another flag that the covering is not draining well.
For most roofing materials, ponding indicates that the supporting decking beneath is not laid to correct falls or has been damaged by internal condensation. Problems with the decking normally means it is not just the covering that needs replacing but also the decking itself, adding more expense to the job but can provide an opportunity to improve insulation.